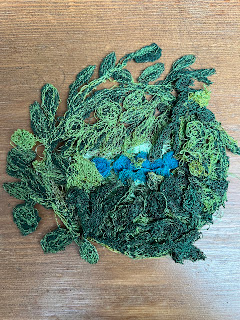
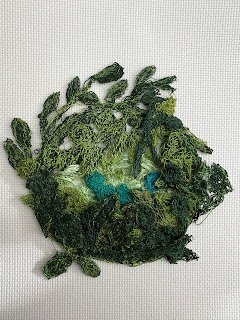
This is a circular stitching project & other than some couching of the 'nest wools' & the edges, there was little stitching. I had a thought in my head from when I did a 3D free motion embroidery course that would work rather well as a nest. I have used solvy film in another project too & understand that the threads have to overlap because that is all that hold it together once the water soluble film is washed away - an interesting challenge.
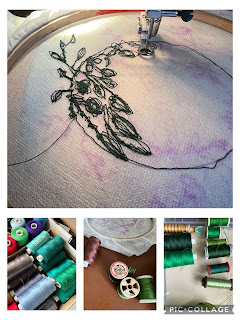
I have 2 sewing machines set up in the spare room - my trusty 20 year old basic Toyota does not have drop feed dogs which is not ideal but the feed dogs are covered by a plastic plate for free motion (so the work can glide / be guided by hand only). I had to modify (sand) a wooden hoop so it would fit more easily under the free motion foot once attached & it works well (with red marker to show where to slide it in & out)
I have experimented with various free motion feet & have a selection - some working easier than others. Last year a friend was selling her electronic Brother machine, the very model I had been looking it, so I bought it from her (she was upgrading to one that could do patterns for commercial work) & it is a dream for stitch choice & it does basic lettering too.
However, the new machine, while the feed dogs drop easily, has a smaller working space & it is lower so there is less room to maneuverer an embroidery hoop by hand. However, having 2 machines, means that one can be set up with the right free motion feet & plate so that makes it quicker to try things.
You can see the difference in the working space between the machines.
This morning, acting on my inspiration, I added some Solvy film to my hoop, traced the 4 inch circle on to it & drew in some details of ivy like vine leaves. I drew some leaves outside the circle, as well as at the bottom & the top with the idea of bending them over to hide the nest part of the sewing with an additional layer. I should have used the frixion pen as this sewing one didn’t give neat lines but it was ok in the end.
From the course i did, I remembered to select various shades of greens to give the work depth, threaded up the machine, then lost several hours to the immersive time of free motion embroidery. (Changing bobbins is easier on this one for free motion as the work can be kept in place while you do it)
Bundling up some green silk threads from my late mother in laws stash that were too fragile to be sewn with, but were perfect for a nest. I pulled some off, put it between two layers of Solvy film then just ran a few machine threads over it to keep its shape.
The stitches have to loop over each other, circular motion works well because it holds the threads together when the work is dipped in warm water & the water soluble film disappears completely. The threads give it structure but they can be manipulated in creative ways which is what I enjoy.
It is so easy to get lost in this process & once I got on to the second green thread, I could see my outline sketch was taking shape & it felt more ordered. Several other thread changes & I decided it was done.
Changing the cotton to blues, I decided to do the egg shapes suggested in the brief in machine embroidery. Because the section was so small, I doubled over the film & just held the edges between my hands to give it rigidity. It worked but it did snag a few times.
The moment of truth - taking it all downstairs to the basin & draining board - will it hold its shape? Have I joined the sections enough & was my design appropriate for the sewing?
The silk threads held in the simple outline, the blue threaded eggs kept their shape - the largest one to be dipped last ...
Phew, the film dissolved immediately leaving a very good outline of a hedgerow of leaves & a good circular shape.
I lifted it out, it still felt sticky with the film, so I changed water & dipped it again, then placed it gently on a clean tea towel to dry.
I pinned the nest shape to a piece of polystyrene (as we had done on our course) to hold its shape. This also made it easier to fold over the tendrils that I had made outside of the circle. I am rather pleased with how well they flipped over & on to the circular shape. I pinned them in place to dry.
What to do now seen as I have already hemmed & edged the felt nest? Perhaps I will add it to the reverse of that panel as the alternative or perhaps I should add it to my 100 day sewing roll that is not making as much progress as it should ...
What do you suggest? Give me some ideas please. Thank you for your company, inspire me with your projects.
Dee 🪡🧵🪡


No comments:
Post a Comment
♥ Hi - thank you for stopping by, I hope you enjoy your visit♥.