Showing posts with label circular stitching. Show all posts

Sunday, 13 October 2024

#10 Circular Stitching - Fascinating fungi


 Month 10 of 12 months circular stitching saw the brief look at fascinating fungi & the forest floor in late Autumn when fungi are abundant & varied.  The previous ones are all listed here ...

The brief was to make fungi in our 4 inch circle. The suggested stitches were the fly stitch combined with the pistol stitch. 

It was suggested to make 3 smaller lightly padded Suffolk puffs then turn them over for the stitching to be done on the round back, suggesting the gills of the mushrooms 

I remembered that I still had these 3 beaded & stitched moss shapes from a stitch along on another group  - making zen is always so inspirational.

The stitches had been challenging & varied - several stitch combinations in each shape & they were still on a hoop along with the various green threads I had used.  They are perfect to combine with this challenge because fungi & moss live side by side on the forest floor. 

I cut out the 3 shapes & decided to add them to the already cut shapes I had prepared for the year. 

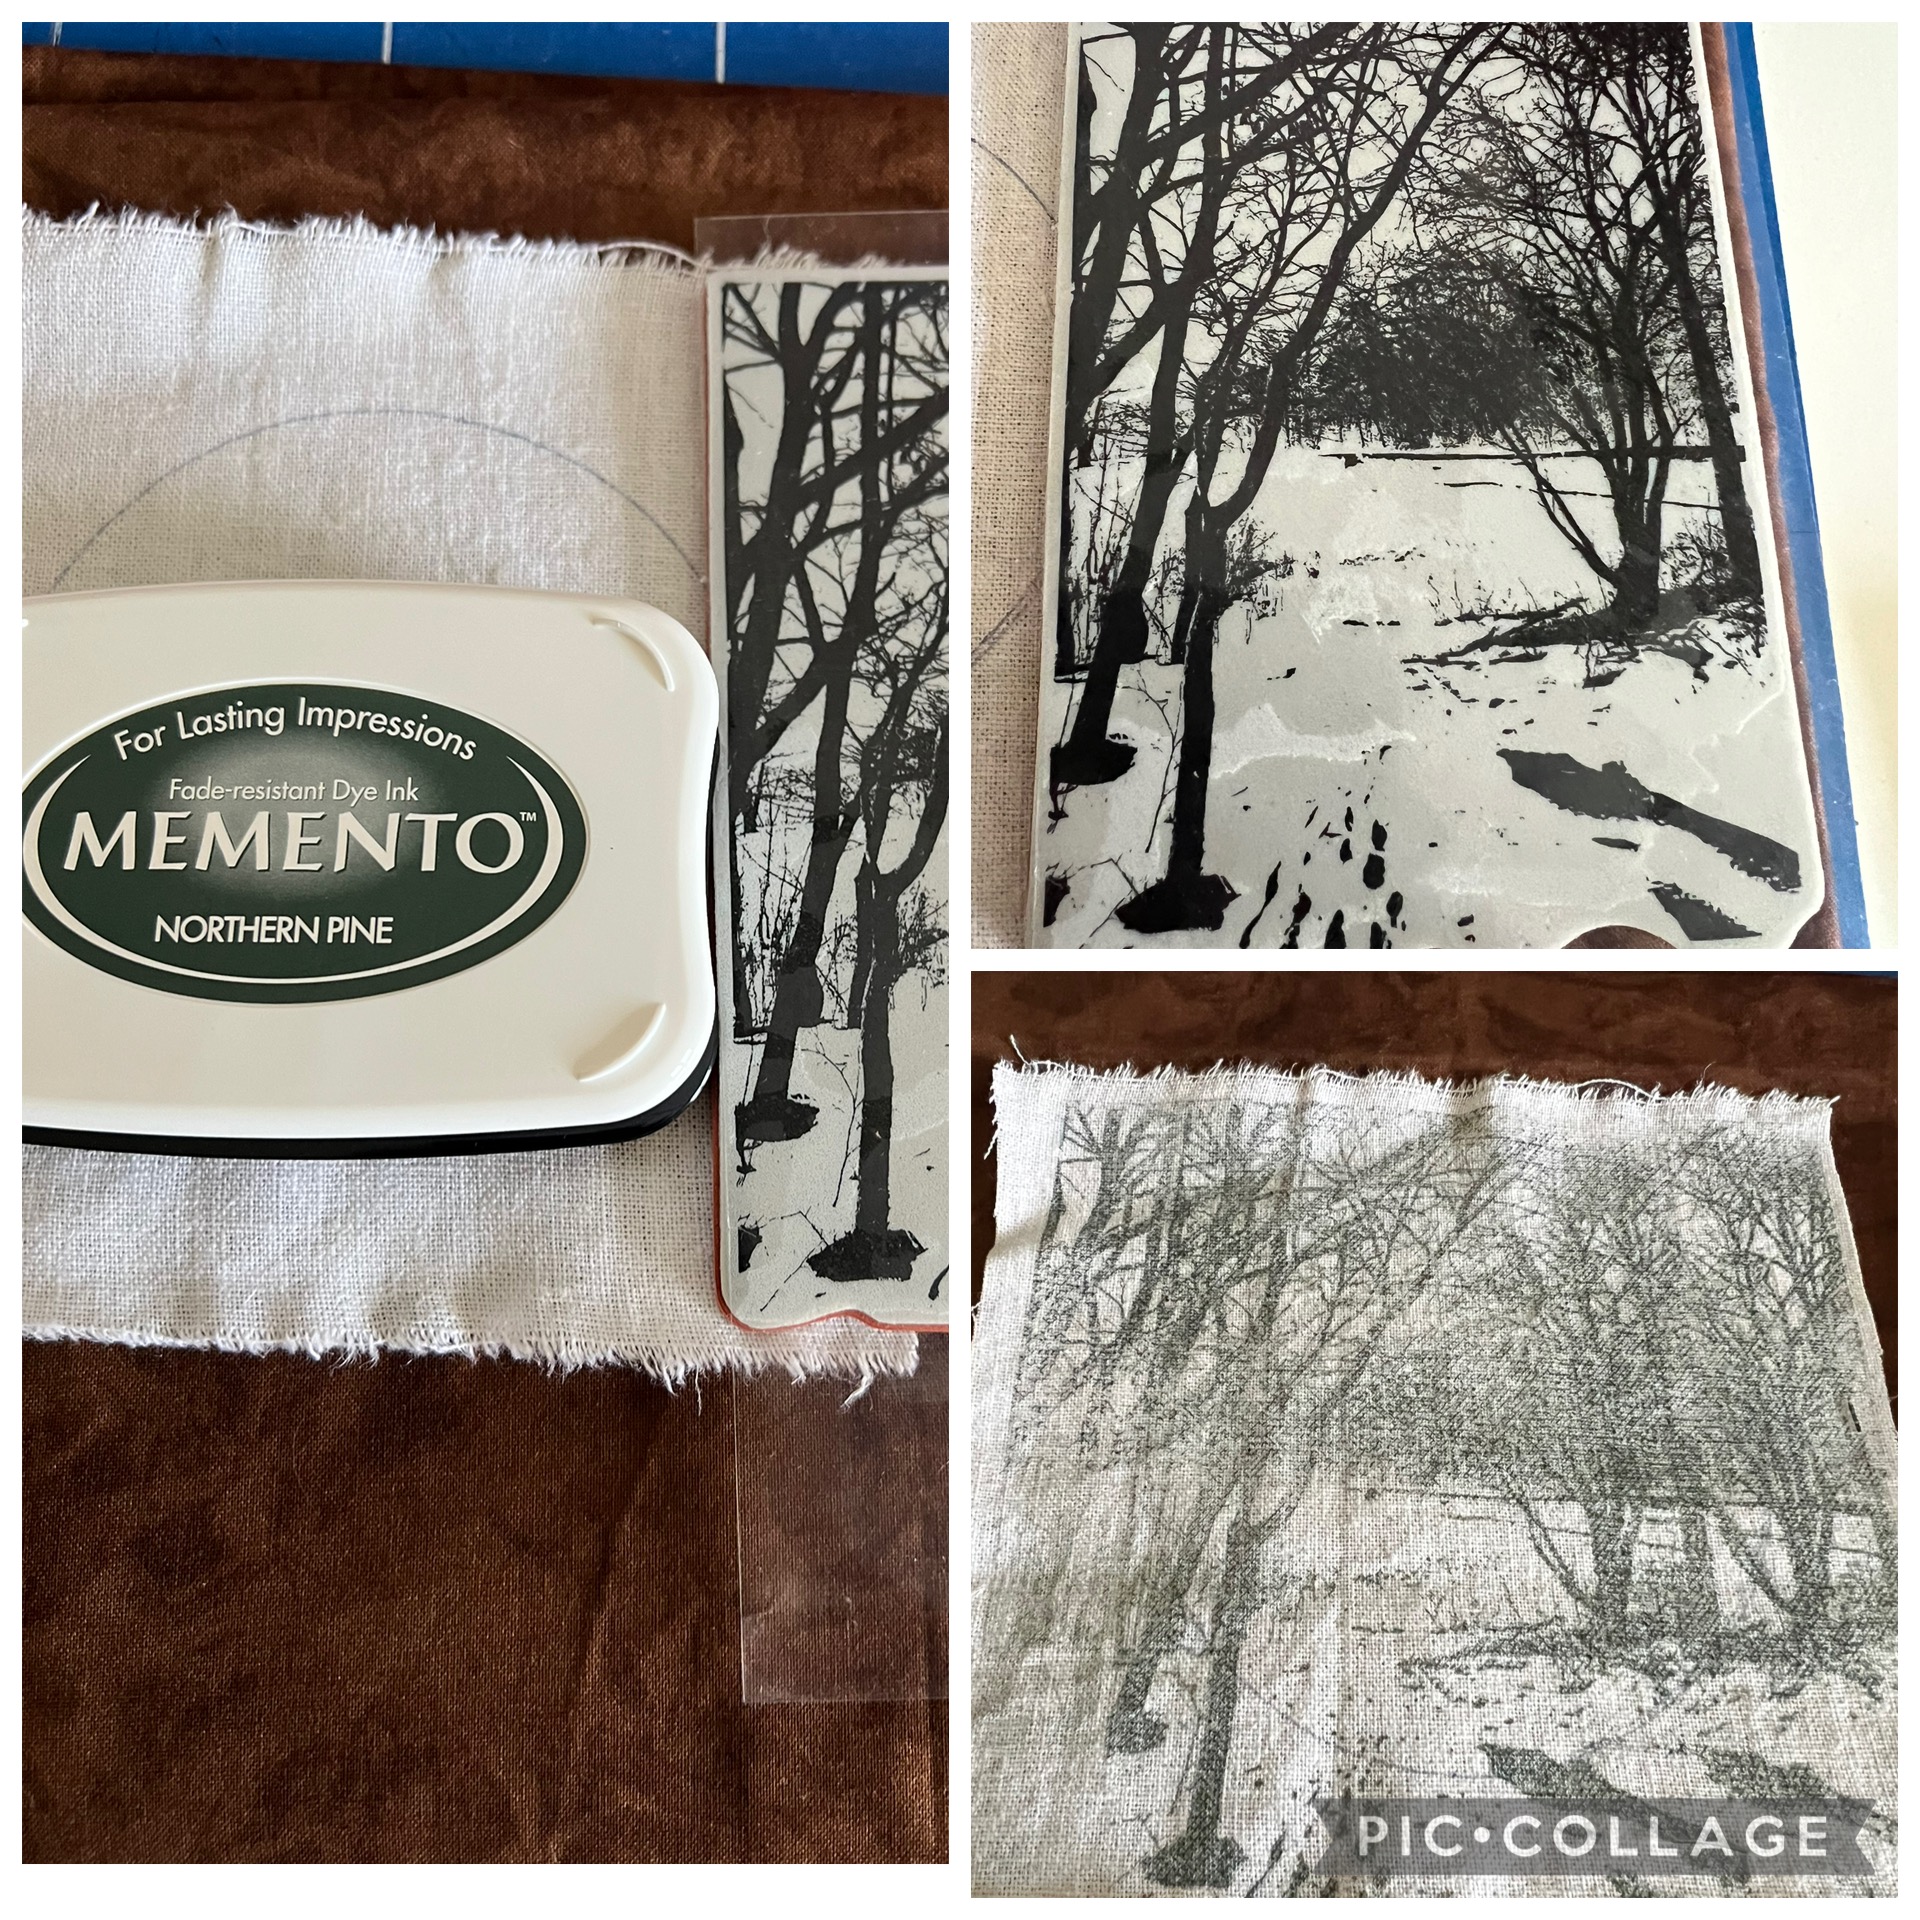
I came across this forest scene stamp in my stash & thought - why not? 

It is my understanding that heat will set the ink from normal stamp pads on fabric so I stamped the forest then heated it to set (supposedly.) 

The 4 inch circle was drawn on this stamped background then the cut out moss shapes positioned along the circle. 

I made 2 brown Suffolk puffs, turning the brown fabric around so the reverse was used as it was a gentler colour for the fungi. 

I decided to use the gathered side & as suggested, whip stitched the edges to give it a slightly raised look & then whipped some of the folds to give the structure of the underside of the fungi. 

 The 3 shapes were stitched on to the circular shape, some beads in the same colour dotted around the remaining circular shape. 

We had made these tiny flower shapes in our Blossom stitching in August so I combined circles in green & brown fabric to make the flower shapes & thought just 3 was needed on the forest floor. 

I am not sure about this but I lightly felted in some wafts of felting wool to suggest leaves & canopy on  the stamped background. 

The 3 edges were machined, the stiffener added in & the last edge stitched. It was overstitched by hand with blanket stitch as required so that the final task after month 12 will be to join them - we do not know that detail yet but I am confident mine will be fine as I have followed the binding instructions. 

It is interesting doing something quite different each month, we are encouraged to be bold & original & this is what I have done. 

Edited note - I was pleased that I pushed the boat out & incorporated stamping in this effort but it felt unfinished so I thought - it is mine completely so I am going to try something else. 

I used Ikea fabric pens to lightly add in details on the stamped background to give it definition. Just very light mark making to make it feel more complete & it certainly helped. What do you think? 

Thank you for stopping by, taking time to read, like, share or comment, 

Dee ๐Ÿชก๐Ÿ“๐Ÿงต๐Ÿ‚

Friday, 10 May 2024

#6 Circular stitching from source to sea


Thank you to those who have followed this circular stitching challenge - we are now half way through the 12 month challenge.  When I started in January, it was something quite different to what I usually do but thought it looked interesting.  Read about it here ... 

#1 A Snow blanket 

#2  Conceal & reveal 

#3  Renewal

#4  Nesting time alternative nest

#5 Blossom Time 

However, to keep myself on track I cut 13 each of the fronts, the circles, the backing & the stiffening fabric & put it in a separate plastic along with the thread I used to blanket stitch all of them. My thought was I was more likely to do it if it was all ready. 

The 6th challenge is from source to sea

The suggestion was a circular shape suggesting the route of a river, but as always, it is a suggestion only. 

I had a small FQ piece of sea fabric I had found a while back in a charity shop & thought it would be a useful base to cut the circle from. I have been away along the coast in Scotland so that influenced my design. 

I cut a larger circle then pleated & folded it to an image I preferred then pinned this & ironed it to hold it in place.  I  think the fabric is more interesting with the fabric folded or pleated because it is more dramatic. 

The circle I cut from this was a bit wonky due to the pleating but that gives the shape some fluidity. 

To follow the suggestion of circle or water, I decided on a rather large embroidered wave, the type you would see in mid ocean, perhaps in the North Sea. 

I used a very restricted set of threads - variegated dark & light blues, variegated yellows, white & some brown embroidery threads. If I have too much thread choice, it takes too long to decide on each & that takes away from the creative process. 

I embroidered for about 2 hours from start to finish & it is a good effort. The only fabric addition was a strip of dark blue linen suggesting the river joining the sea; this was frayed & blended in to the scene. I think it works well. 

The whole square was then machine stitched on 3 sides to the backing fabric, the stiffening square inserted then the 4th side stitched up. The whole square was then overstitched with blanket stitch in the same thread that the other 5 have. I still have to do the name embroidery on a black fabric for the back of the last 3 ones - I will do them all at the same time as I have to set up my sewing machine to do the embroidery. 

I am pleased to have stayed on track with the challenge, half way through & it is challenging in a very good way.  

Thank you for stopping by, I always appreciate your comments, 

Dee  

Wednesday, 7 February 2024

#2 Conceal & Reveal circular stitching ...

 The second month of the circular stitching project has 'Conceal & Reveal' as its seasonal title, the brief suggesting circular holes that have a padded / infilled backing that is then stitched in whatever way we like to reflect winter. 

I  immediately thought of snowdrops as they are slowly emerging from their winter blankets of earth or snow. That leads on nicely from the previous snow blanket them & uses similar thread colours (the above picture is some I selected from my stash to use on the first one) 

The 6 x 6 inch page with the 4 inch circle was once again ready for the brief - I used some fine chiffon fabric I had with some soft batting in it.  

I cut 3 holes & blanket stitched around the edges to hold it in place with each hole - very fiddly.  

I had to work out how to put the padded chiffon behind - that was challenging as the chiffon kept slipping & the batting did not stay in front as I hoped. I had to revert to stay stitches (loose stitches to hold it in place.) 

The brief said edge with a couched rope so I opted to do some wool to suggest a tree shape with the snowdrops below. 

The tree shape looked flat so I added some beads to it in places & they worked particularly well on the bottom, suggesting new growth emerging. 

The 3 round shapes became snow mounds that I embroidered snow drop stems & leaves reaching out of - that part was actually easier than filling the chiffon mounds. 

I am rather pleased with the second page of this project, there are some things I would change but it is done rather than too much planning & thinking which stifles the creative process. 

I am always grateful to the generous creative souls who inspire & lead us to be more creative through such projects - a great inspiration. 

Thank you for stopping by, I hope you are inspired to seek out projects that interest you. That is where the internet is really brilliant, 

Dee ๐Ÿงต๐Ÿชก❤️